
The center console box assembly is the same for '73-'81 Camaros and all '70-'81 Trans Ams.
The good news is that nearly all of the restoration parts are still available; feel free to browse our Online Store to pick up any parts you may need for the job.
The project of the day is to redye and refurbish the center console for your 70-81 Fbody.
While this seems like a large task it takes only about 2 hours start to finish.
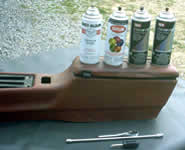
You will need the supplies below.
1) YOU WILL NEED THE FOLLOWING SUPPLIES:
* 1 Can SEM or equivalent vinyl/interior dye
(I use only SEM brand; this color is Camel Tan)
* 1 Can Satin clear coat
* 1 Can SEM Landau Black
* 1 Can Rustoleum silver metaliic spray
* Paint thinner
* Spot Putty
* Standard ratchet & socket set
* Phillips head screw driver
* Gloves and rags
|
|
|
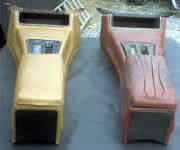
2) Here is our Donor console (RED) beside a freshly completed one, this will work wonders on your interior!
Unbolt the center console from the lower dash there are 2 small bolts on the far left and right. Next, unbolt the 2 bolts inside the console box bin. They are located inside the bin to the far front and rear. Remove the console box.
Now you will see 2 bolts under where the bin sat that hold the rear of the console to the floor. Remove those.
You will either want to remove the shifter knob by pulling the small hog ring that holds it to the shaft of the automatic shifter or simply unscrew the 4 small hex screws that hold the auto shifter plate onto the console.
You can then, depending on how you pulled it, slide the shift plate up and off, or diaginaly to the side to get the center console up and out.
|
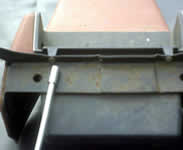
3) Once the console is up and out you, will want to remove all of the console hardware.
On a trans Am, this will include a map pocket... and also, on both Camaro and Trans Am, it will include the power window switch (if equipped and the rear backer plate).
4 bolts hold the map pocket in place.
2 bolts hold the rear plate in place. The power windows, if equipped, are held in place by an underlaying bendable bracet. Bend the arm up and down and it will slide out.
|
|
|
|
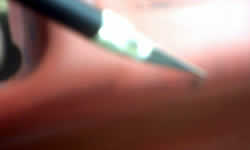
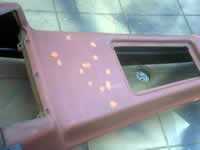
4) Now we have a bare console to work with. If your vinyl is ripped, take an Exacto knife and trim it so it lays flush (See above left photo).
Once console is removed, you will want to wipe the console down with thinner to clean the unit before you apply spot putty.
Using some spot putty avilable at most auto parts stores, fill in all the various blemishes. This will fill cigerette burns, nicks, and small tears.
I use my finger to apply the filler, as I find I can "feel" the dings better.
Let the putty dry for about 2 hours before sanding with 180-320 grit sand paper. Some bigger burns will take 2 to 3 applications/sanding to get perfect.
After sanding the spot putty and before dying wipe the unit down w/ thinner again to remove any putty dust or hand oils.
|
5) We are ready to to dye the console.
I found with SEM dyes, it is best to lay the first 3 coats VERY VERY light and build a foundation allowing a 3-6 minute flash time between coats.
I lay a total of 7 coats of the dye.
Additionally, since it is a console with high traffic/abuse, I lay 4-5 thin layers of a satin clear coat.
I use satin not high gloss, because the finished product will have a more factory appearance. Gloss tends to be too shiny.
|

|
|
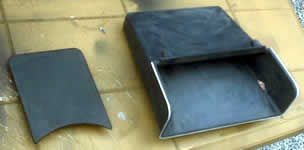
6) We now want to redye the backer plate and also the map pocket.
First wipe them down with thinner to clean them good.
Use the same paint method as above; lay thin coats.
I have found only 2-4 coats are needed to bring the black back to life.
Next, use a Q-tip to apply silver metallic paint on the outer edge of the pocket to produce a very factory like accent strip.
|
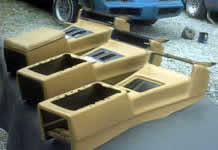
5) Here's the finished product with various degrees of accessories.
Total spending on this project was roughly $35.
A reproduction console is $260+ shipping.
Unless you are going with a black console, you'll still need to redye the reproduction one!
Let the console sit overnight, then reinstall into your car and enjoy!
|
|
We at Fbodywarehouse hope this restoration tip helps in the preservation of your Fbody!
|
|
 Home
Home  About
Us
Contact Us
About
Us
Contact Us  Pace Car Registry
  Site
Map
Site
Map


