So, you have a 1980 or 1981 Z28 Air induction hood and for some reason or another
the flapper mechanism simply does not work correctly ?

This HOW TO article will show you how it is put together
and all of the various internal components of the actual Air Induction scoop.
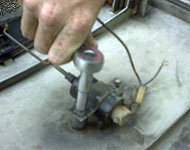
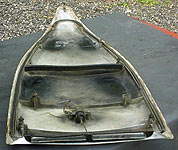
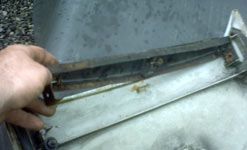
1) Here is the scoop with all the internals removed; you can see what controls the Air Induction hood scoop.
We will now show you how to completely gut one of these units and replace any needed parts.
Nine times of out ten the solenoid motor is bad or the flagger is bent.
Both of which are easy to replace.
Note on this unit the flapper was slightly bent not allowing the flaps to open and close correctly.
|
|
|
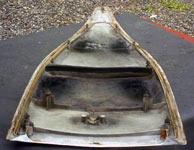
2) Remove your scoop from the hood.
This is done my removeing the nuts that are mounted on the inside of the hood. There are eleven total.
Refer to the picture for a general idea on stud and nut location.
Once you have removed all of the mounting nuts, slowly pry upward and evenly while working front to back.
Then, pull the scoop up and off the hood (from the top side). Be careful, as there is some adhesive holding the unit down.
|
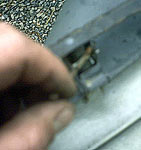
3) To remove the solenoid motor, simply unbolt the 2 bolts located on the left and right of the solenoid. There is a U-shaped bracket that holds the unit to the underside of the scoop.
The solenoid is still connected to the flapper via a small metal connecting rod; lift and twist the flapper solenoid to detatch it from the rod.
Remove the other side of the rod from the flapper by the same step. Simply turn the rod over and up, then slide the rod away from the flapper.
|
|
|
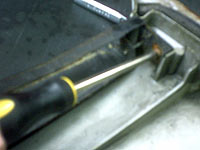
4) 6. The flapper is help in place by 2 phillips head screws, one on each side.
On northern/rust-belt cars, be sure to pre-soak the screws with WD-40 or a penetrating oil for easy removal of them.
Once you remove both the screws, pull up and remove the flapper.
|
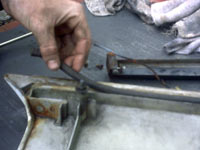
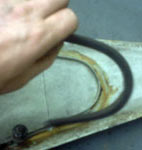
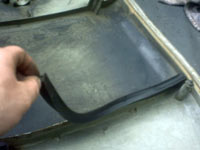
5) Finally comes the weatherseals; there are four total.
Two are long and run down the sides, another is U-shaped and wraps the cone (front) of the scoop, and finally the fourth runs from side to side and seems to be dividing the air chambers inside the scoop.
I have found that removing these are easy and best done by hand, slowly and carefully.
Start by simply pulling up and out; I normaly start on one end then go about 1/2 way and come back, starting at the other end and meeting in the middle.
|
|
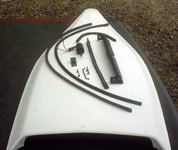
6) One these gaskets are removed you have a 100% bare Air Induction hood scoop.
At this point, you can add new weather seals, a new solenoid, and refurbish you flapper with new paint and oiled hinges, etc.
For show cars this is also the best time to paint the scoop while it's bare.
Reinstalling the hardware is same procedure, starting with weather seals and moving backwards.
I have found that bench testing your solenoid while it is out is easiest, which is done by hooking it up to a 12v battery or battery charger.
In this case the solenoid was fine.
To make this unit functional again, we simply removed a ding from the flapper and reinstalled everything; now the unit functions great!
|
We at Fbodywarehouse hopes this restoration tip helps you preserve your old Z28!
|
|
 Home
Home  About
Us
Contact Us
About
Us
Contact Us  Pace Car Registry
  Site
Map
Site
Map