|
|

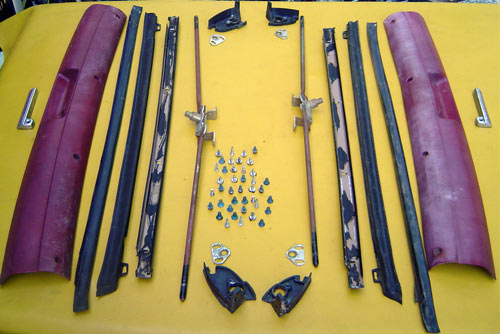
The main focus of this restoration article will be to gut a set of Fisher Body style t-tops.
This will allow you to either replace worn and broken parts or
teardown, maintain, and refubish your existing set.
**(Quick Fact) This style Fisher Body t-top was available from
1978-1981 on Camaro Z28 and Firebird Trans Am.
-[ CLICK pictures for larger images ! ]-
1) YOU WILL NEED THE FOLLOWING TOOLS:
* Normal-Tipped Phillips Head Screwdriver
* Large-Tipped Phillips Head Screwdriver
* Thin-Tipped Regular Head screwdriver
* Small Hammer <--"Seriously!"
* Small Socket/Ratchet Set - Standard
|
|

|
2) This set of Fisher Body style T-tops was taken from a 1978 Camaro.
|
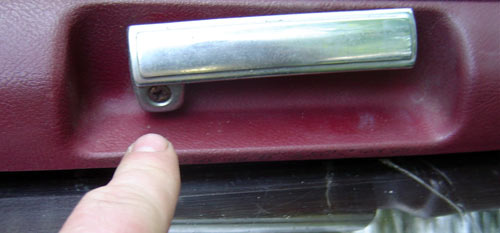
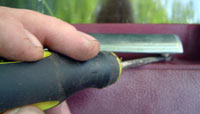
3) CHROME HANDLE REMOVAL - You will need to remove these
handles to start the tear down. The handle is held in place by 1
Phillips head screw (each side).
These screws can be tough to remove; penatrating oil is a good
idea here.
**TIP**(Tapping the head of the screw driver with
a small hammer while turning also helps to un-seize frozen/rusty
screws.)
Once you remove the screw, the handle may or may not pop
right off. I have found a thin flat head screwdriver and a
prying motion outward (see picture) will do the trick.
If simply replacing or polishing the t-top handles, simply
reverse step 3 when done.
|

|

|
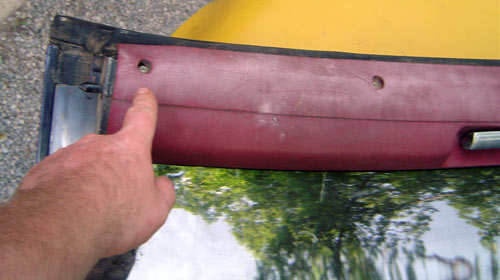
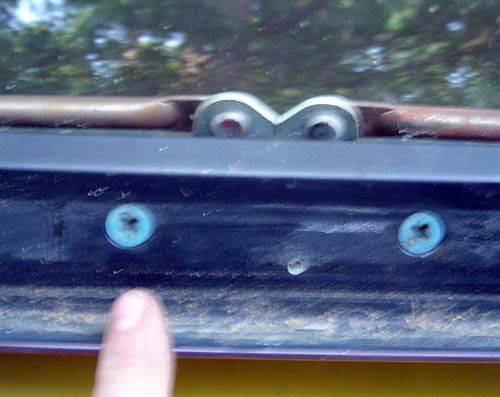
4) INTERIOR TRIM REMOVAL - Now you can remove the interior
facing t-top trim. This is secured by 4 Phillips head screws
running across the base. Simply remove the 4 screws.
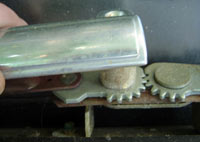
Once you remove these panels, I suggest greasing/lubricating the gears shown
below before reinstalling the trim.
It's a good idea to lube the gears even if just replacing or redying the panels, as a part of your maintenance program.
A thin coating of heavy gear lube/axle grease will work, as well as a spray lubricant.
|
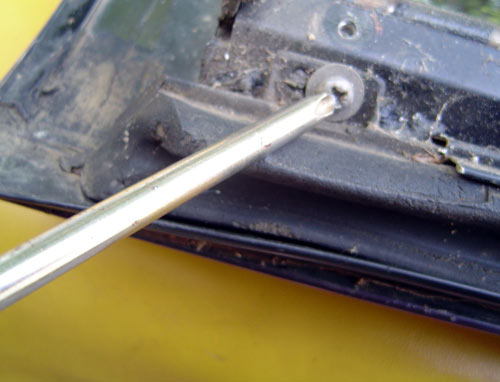
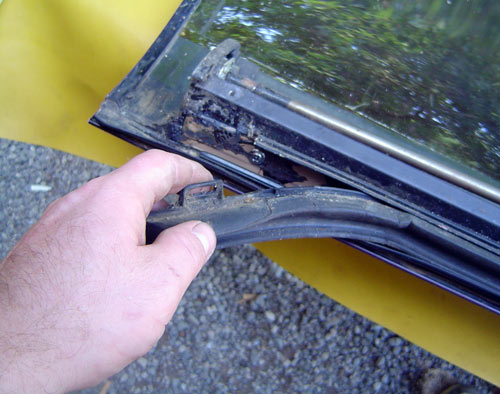
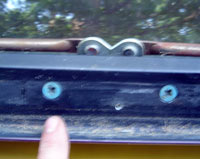
5) T-TOP WEATHERSTRIPPING REMOVAL - This is a pretty straight-forward step... before the gears can come out, the weatherstripping must come out.
This is easy, as there is a Phillips head screw located on the far left and
right.
Remove them and then pull up and out on the weatherstrip from the channel (see illustration).
|
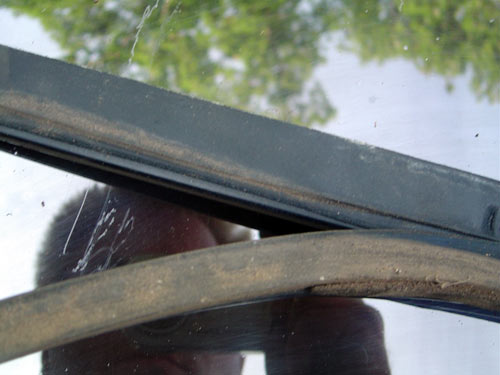
6) Once the weatherstrip is out of the channel, you can see the
4 screws holding the channel onto the t-top; unscrew these 4.
Once the channel is removed, you can now gently pull the
outter rubber sheeting weatherstrip out by hand.
If replacing the weatherstrips only, simply reverse order from here to complete the task.
|
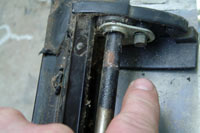
7) HANDLE DRIVER GEARS AND RODS - The T-top drivers and gears
are next to come off.
These are the gears that move the rods outward to secure the t-tops on the car.
Here you will find some LARGE screws, which I suggest tapping on with a hammer while you begin to unscrew them.
There are 2 located at the middle of the t-top, by the handle (reverse side)... once removed, the unit can be slid out.
|
|
|
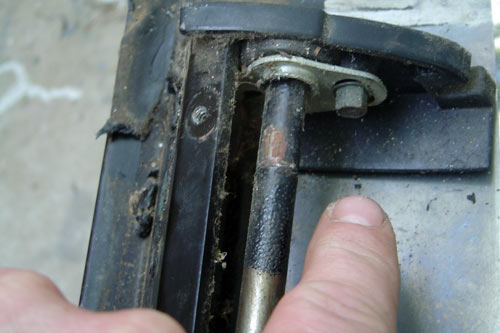
8) ROD GUIDE AND END BLOCK REMOVAL - Removing the rod guides
if lobed or damaged is simple also.
There are small bolts located on the far left and right (2 per side , 4 per
t-top).
Unbolt these and the thin lop simply falls off free.
|
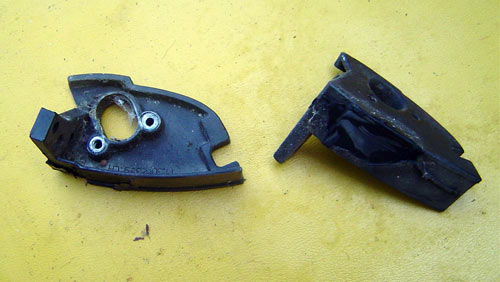
9) END BLOCK REMOVAL - End Blocks can be removed also they are held down by 2 large style Phillips head screws (each side).
You will need to pry up on these, as they are factory sealed onto the
t-top.
I lightly tapped these free with a hammer.
|

|
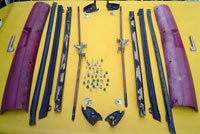
10) The tear down is complete!
When reinstalling, simply follow directions in reverse order.
Remember to grease the gear drives for smoother operation.
Also on the large screws, some Antiseize type agent is always a good idea.
Always clean all parts and new weatherstrips are recomended.
|
We at Fbodywarehouse hope this restoration tip helps in the preservation of your Fbody!
|
|
|
 Home
Home  About
Us
Contact Us
About
Us
Contact Us  Pace Car Registry
  Site
Map
Site
Map